


I always like looking at pictures of other people’s displays to gather ideas on how to make new things for mine. So I thought I’d put up a few pictures for other people to look at!


Here is a cool time lapse video from December 24, 2011!
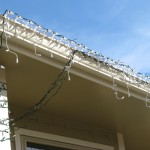
Here are some pictures from our Christmas light setup! Those curious about how everything goes together can check out our construction manual here (PDF warning).


While there are plenty of write-ups out there on how to build mega trees, I decided to document our design here. This design has been used successfully for a 10′ mega tree for the last two years and we are reusing it to build a 7.5′ (medium) tree.
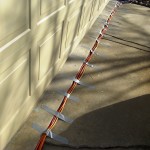
First for the base, we used an 8′ 2×4 cut in half. A groove was made in the center of both boards wide enough that they would be able to interlock. This joint was then glued; clamping allowed the glue to dry. Once the glue has dried, a hole was cut in the center of this X with an outside diameter the same as the PVC pipe of the tree (we used 2″ PVC, which has a slightly larger outside diameter). Holes are then drilled in the 2×4 toward the ends of the X to allow a 1/2″ piece of rebar to hold the base down. This X will receive a coat of primer and a coat of hunter green paint before Christmas to protect it from the elements.
Rebar stakes were made by cutting pieces of rebar, then heating it up until it would bend into a 90-degree angle (L-shape). These will be used to hold the base to the ground. Obviously it would be advisable to first check on any underground utilities that these stakes could strike!
The tree-topper is more complicated. We started with a drain plumbing fixture designed to be used with 2″ PVC (also compatible with 3″). 4 holes were drilled around the middle section of the pipe to fasten eye-bolts to the fixture. Wire rope will be used with these eye-bolts to guy wire the tree (stabilizes the tree and prevents problems with wind). We then take apart the top part of the plumbing fixture; removing the threaded drain and loosening the bolts holding the fixture’s threaded side on. A 3/4″ piece of wood is then cut in a circle shape with another circle cut inside of that to allow the threaded drain to be used. Longer bolts from the hardware store and holes drilled in the piece of wood will then allow the fixture to come together. Hooks can be screwed into the wood around the circle to hold strings of lights (I zip tie light strings to parachute cord so that the parachute cord holds the tension). The threaded drain can be used to mount a star (or other object) to top the tree.
I found this calculator to be useful!
Pictures are worth a thousand words each! Here is four:


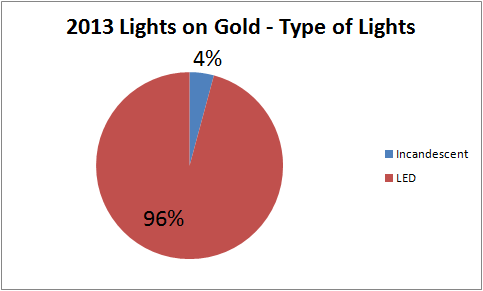
Because pie charts are cool, here is some pie charts of the 14,419 Christmas lights in our 2011 show!


I am planning on adding floodlights that will wash the front of the house with color for 2011. Here is a video of a test on a ceiling indoors:
The following pie charts show how our 12,000 lights break down by color and type!


We’ve changed our radio frequency to 99.5 FM in an effort to improve the quality of our sound from the street.